ImageView 图片控件,用于显示图像资源,例如Bitmap (opens new window)(位图)或Drawable (opens new window)(绘制资源),也通常用于给图像着色和处理图像缩放。
# 基本属性
android:src设置图像的资源android:background设置控件的背景
注意:
src 与 background 有着不同的作用,src设置的是控件的资源,background设置的是控件的背景,二者可以同时使用。src是按照图片资源的大小进行填充,不会直接拉伸资源,background则会根据控件的宽高进行拉伸。
示例:
xml布局:
<?xml version="1.0" encoding="utf-8"?>
<LinearLayout xmlns:android="http://schemas.android.com/apk/res/android"
    android:layout_width="match_parent"
    android:layout_height="match_parent"
    android:gravity="center"
    android:background="#736C6C"
    android:orientation="vertical">

    <!-- src设置资源,background设置背景 -->
    <ImageView
        android:layout_width="wrap_content"
        android:layout_height="wrap_content"
        android:src="@mipmap/ic_launcher_round"
        android:background="@drawable/image_jim_logo"/>

    <!-- src 属性不会对资源图标进行拉伸 -->
    <ImageView
        android:layout_width="200dp"
        android:layout_height="wrap_content"
        android:layout_marginTop="20dp"
        android:src="@drawable/icon_test"
        android:background="#03A9F4"/>

    <!-- background 属性会对其资源进行拉伸 -->
    <ImageView
        android:layout_width="100dp"
        android:layout_height="200dp"
        android:layout_marginTop="20dp"
        android:src="@mipmap/ic_launcher"
        android:background="@drawable/icon_test"/>

</LinearLayout>
效果:
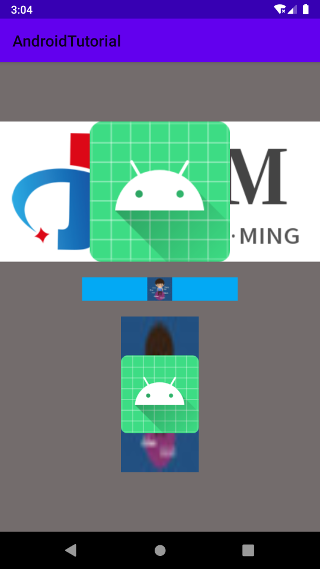
提示:
xml属性设置的 src 和 background 资源,也可以通过代码进行动态设置:
src 对应代码设置的:setImageDrawable(Drawable drawable) 方法
background 对应代码设置的:setBackground(Drawable background) 方法
# 自动缩放图片
ImageView 提供了adjustViewBounds属性,用于设置缩放时是否保持原图宽高比, 单独设置不起作用,需要配合maxWidth和maxHeight属性限定一起使用才可以生效。
android:adjustViewBounds:设置缩放是否保存原图长宽比,true 或者 flaseandroid:maxWidth:设置ImageView的最大宽度android:maxHeight:设置ImageView的最大高度
示例:
xml布局:
<?xml version="1.0" encoding="utf-8"?>
<LinearLayout xmlns:android="http://schemas.android.com/apk/res/android"
    android:layout_width="match_parent"
    android:layout_height="match_parent"
    android:background="#736C6C"
    android:gravity="center"
    android:orientation="vertical">

    <!-- 正常图片大小 -->
    <ImageView
        android:layout_width="wrap_content"
        android:layout_height="wrap_content"
        android:src="@drawable/image_jim_logo" />

    <!-- 缩放图片大小,限定最大宽或高为100dp,缩放时保持原图长宽比 -->
    <ImageView
        android:layout_width="wrap_content"
        android:layout_height="wrap_content"
        android:layout_marginTop="20dp"
        android:maxWidth="100dp"
        android:maxHeight="100dp"
        android:adjustViewBounds="true"
        android:src="@drawable/image_jim_logo" />

</LinearLayout>
效果:
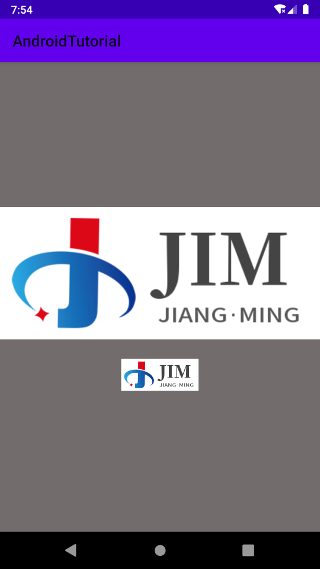
# 设置缩放类型
scaleType属性可以设置图片显示的缩放类型,图片的大小是各种各样的,有的时候需要图片以一种特定的方式来显示,这个属性就可以用上了。
基本属性:
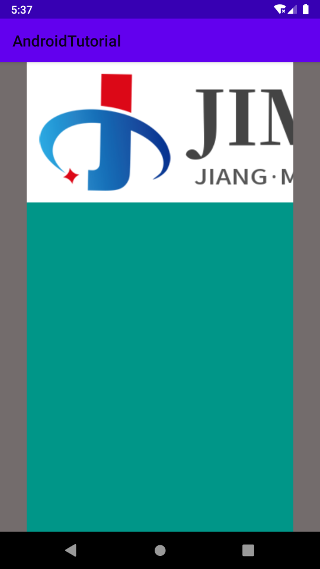
fitStart:将图片等比缩放到控件大小,直到宽或者高任意一边到达控件边大小,缩放完成后将图片放在控件的左上角位置。图片的宽高比例可能存在控件中有部分留白情况。fitCenter:将图片等比缩放到控件大小,缩放完后将图片放在控件中间位置。图片的宽高比例可能存在控件中有部分留白情况。fitEnd:将图片等比缩放到控件大小,缩放完后将图片放在控件右下角位置。图片的宽高比例可能存在控件中有部分留白情况。fitXY:将图像的宽和高进行独立缩放,使得该图片完全适应控件大小,但是图片的横纵比可能会发生改变,产生拉伸情况。center:保持原图的大小,显示在控件的中心位置,当图片的 size 大于控件本身的 size 时,超过部分将被裁剪处理,图片可能有缺少部分显示情况。centerCrop:保持宽高比缩放图片,直到完全覆盖控件大小,然后居中显示,可能会出现图片的显示不完全。centerInside:保持宽高比缩放图片,直到控件能够完全地显示图片,然后居中显示(以完全展示图片的内容为目的)。matrix:默认值,不改变原图的大小,从控件的左上角开始绘制原图, 原图超过控件的部分作裁剪处理,可能有图片缺失内容情况。
示例:
- fit类型相关示例
xml布局:
<?xml version="1.0" encoding="utf-8"?>
<LinearLayout xmlns:android="http://schemas.android.com/apk/res/android"
    android:layout_width="match_parent"
    android:layout_height="match_parent"
    android:background="#736C6C"
    android:gravity="center"
    android:orientation="vertical">

    <!-- fitStart, fitCenter, fitEnd, fitXY -->
    <ImageView
        android:layout_width="match_parent"
        android:layout_height="match_parent"
        android:src="@drawable/image_jim_logo"
        android:scaleType="fitStart"
        android:background="#009688" />

</LinearLayout>
效果:
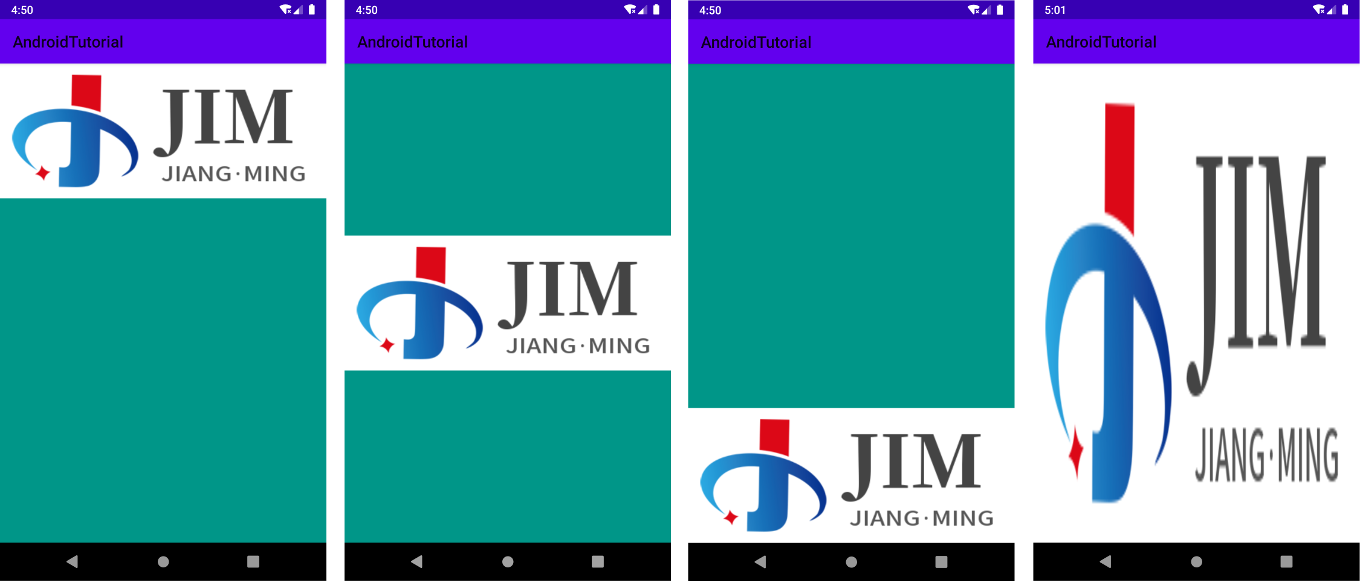
- center类型相关示例
xml布局:
<?xml version="1.0" encoding="utf-8"?>
<LinearLayout xmlns:android="http://schemas.android.com/apk/res/android"
    android:layout_width="match_parent"
    android:layout_height="match_parent"
    android:background="#736C6C"
    android:gravity="center"
    android:orientation="vertical">

    <!-- center, centerCrop, centerInside -->
    <ImageView
        android:layout_width="match_parent"
        android:layout_height="match_parent"
        android:src="@drawable/image_jim_logo"
        android:scaleType="center"
        android:background="#009688" />

</LinearLayout>
效果:
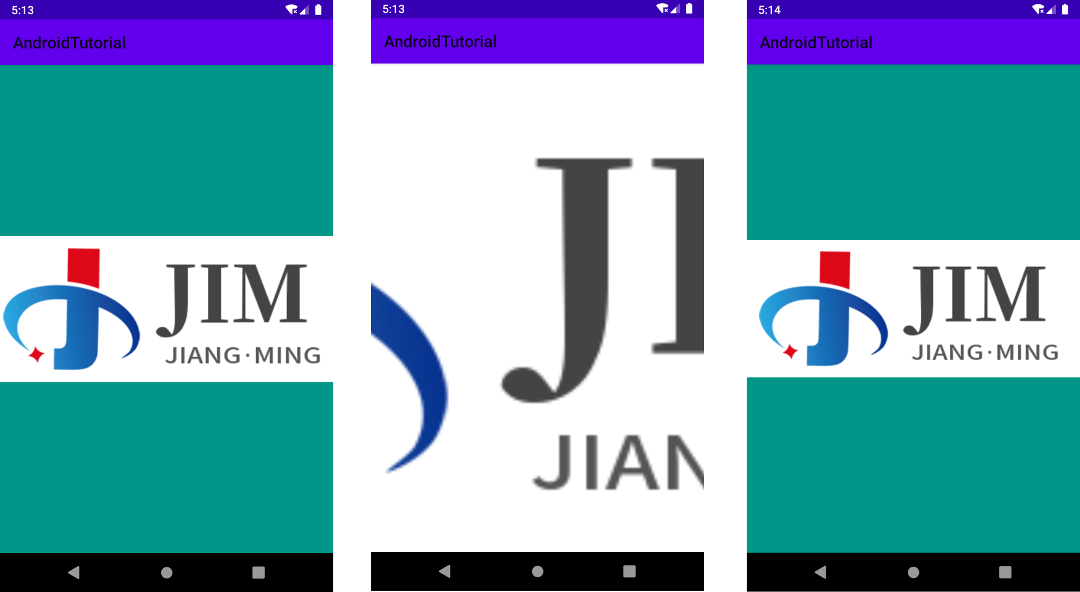
- matrix示例
xml布局方式实现:
<?xml version="1.0" encoding="utf-8"?>
<LinearLayout xmlns:android="http://schemas.android.com/apk/res/android"
    android:layout_width="match_parent"
    android:layout_height="match_parent"
    android:background="#736C6C"
    android:gravity="center"
    android:orientation="vertical">

    <!-- matrix -->
    <ImageView
        android:layout_width="900px"
        android:layout_height="match_parent"
        android:src="@drawable/image_jim_logo"
        android:scaleType="matrix"
        android:background="#009688" />

</LinearLayout>
效果:
代码方式实现:
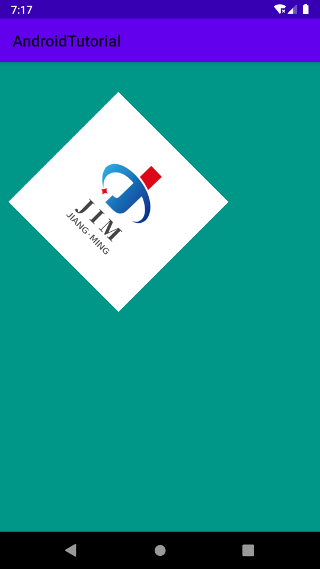
通过代码,不仅仅设置控件是 Matrix (矩阵)类型模式,还可以通过代码,实现矩阵的一些功能,如:平移,旋转图像等等操作。
代码示例:
// 需要先设置模式
imageView.setScaleType(ImageView.ScaleType.MATRIX);
// 创建一个矩阵
Matrix matrix = new Matrix();
// 平移X和Y轴到400,100个单位
matrix.setTranslate(400, 100);
// 顺时针旋转45度
matrix.preRotate(45);
// X和Y方向缩放到0.5
matrix.preScale(0.5f, 0.5f);
// 应用矩阵
imageView.setImageMatrix(matrix);
效果:
Matrix知识点补充
Matrix 提供了四种操作:
• translate:平移
• rotate:旋转
• scale:缩放
• skew:倾斜
操作中有set、pre、post的几种方式:
pre是在队列最前面插入操作,post是在队列最后面追加操作,而set先清空队列在添加操作。
# 小结
本节主要介绍了关于 ImageView 的基本概览和使用方法,如有需要了解更多关于 ImageView,请查看官方 Api 文档:ImageView (opens new window)。